Friday, October 7, 2011

Cobwebs in the Dining Room

Hi everyone! This is the dining room post that I am linking up to All Things Spooky Linky Party I hope you will stop over and check out some of the great ideas that have been compiled here.
Like I said last week, last year was the first year that I had gone a little crazy with Halloween. I am sure there probably some people in our family that weren't necessarily okay with the decor given that the dining room furniture is all antique. In my crazy mind, the antique furniture made it the perfect backdrop! We liked it and we're the ones that looked at it every day. :)
Here's last year's dining room. Again, most of the decorative Halloween pieces came from the dollar store or the Goodwill. Here is the top of the china cabinet.
The Halloween post card is one of many that have been in Jim's family for, well, ever! When Christmas gets closer I will have to post what I did with the Christmas ones last year. Now for under the china cabinet. All tombstones from the dollar store!
The table centerpiece. The cauldron came from the thrift store (almost as good as the dollar store). The dried flowers came from a local grower at a craft show. I turned something upside down and set it inside the cauldron so Skelly would have someplace to sit. I was quite pleased with this piece!
And the buffet wall. Cobwebs, lots of cobwebs!
A closeup of the victrola
Thanks again for stopping by. I hope you will stop by All Things Thrifty and maybe even link up some of your own ideas! Happy Haunting!!!!
~Jen

Thursday, October 6, 2011

Have you repurposed lately?


A couple weeks ago we went to our friend Steph's to help her give her kitchen some character! I packed up a box of "tools", yard sale purchases, ideas etc and Jim packed a tool bag and off we went.  Here we are going to share with you the pictures for two of the projects! We had fun, spent some quality friend time together and made some memories!

At one point we had one of those three tea light candle boxes with the little rocks around the candles...you know the one I'm talking about. It just wasn't working anywhere it was put.  I took the candle holders and put them in the cupboard, pitched the little stones (they made a mess anyway) and tucked the box that held all of it away for "something." The something that we don't know what it is, but one day it will come to us. YEP! That one.  Well the one day came when we started talking about Steph's kitchen and she wanted to do a wine theme. Steph's Mom provided us with the corks (Thanks Peg!)

If only I had a picture of the look on Steph's face when I put the empty candle box on the table and told her my idea. She thought I was nuts! Jim might have thought I was nuts too because I left him in charge of putting the corks inside! A couple of weird looks and an unknown number of thoughts later this is the wine cork project.

Jim did a test run before hot gluing the corks in. Once  had the design he took the corks out and set the design on the table and then glued them in one by one. This is a look at it part way done! Looking good!


All the corks in! Jim trimmed some of the corks to help them fit!


Hot glued some jute around the box! Steph braided some jute together to make the hanger for the piece.


The leaves and grapes are from another piece in the stash that her Mom had given her! That was our trick for covering up the nail in the wall!!!! :)


Project number two was completed by Jim at our house. He took measurements and made some sketches Friday night and Saturday morning he got up and brought them to life. What to use? What to use? Let's have a look in the "inventory", shall we?
Look at all those projects in one place! LOVE IT!!!!
Jim picked the shutter from above and cut it to the dimensions that he had written down the night before. This is the piece we he didn't use for the shelf (give you one guess why I am not showing the piece he did use...)
Look at it all dusty. While dust is part of the fun it was time to transform this shutter into something new and exciting and that is exactly what Jim did! From drab to fab!

We went shopping for 'hooks' for the shelf and found an amazing deal. The 'hooks' were on clearance for $1.24 each.  We like bargains!
...and Steph's Facebook post said "I LOVE LOVE LOVE my new shelf!" WE love YOU, Steph! It was fun to hang out and help out.
Have you repurposed lately and if so, what?
Thanks for stopping by. We love reading your comments! Have a great day!!!
~Jim and Jen

Saturday, October 1, 2011

World Card Making Day part 2

Here is part two. I used the Stampin' Up Loads of Love stamp set and the turkey stamp and sentiment are from Lawn Fawn (part of my most recent Two Peas order). Here are the pics!


 I do like how this turkey card turned out! :)
AND, just for fun, here is a shot of all of today's cards. Not too shabby given the other things I did today too!
Thanks again for stopping by! Have a great rest of the weekend. I am off with another cup of hot tea to enjoy the rest of the night with man I love! Perfect end to a productive day! *here is the link to part 1*
~Jen

World Card Making Day part 1

Hi Everyone! It has been a cold, rainy and chilly day here in Western PA. That made today a perfect day for comfy clothes, socks, a blanket on my chair, some hot tea and card making! I did some visiting with my neighbor Barb today and that made the blanket and the hot tea that much more enjoyable since our visiting was done outside.
I wasn't sure which direction I was going with my cards today. I thought I would work on some Christmas cards but that wasn't the case. I thought I might play with the new supplies I just got the other day from Two Peas, but again, not the case. (I did use one stamp set). All of today's cards are fall themed. Appropriate I suppose. I am splitting the post into two posts so I can link up to the challenge over at Fantabulous Cricut. The challenge was to make a project using leaves. There were some leaves in that stash of stuff mentioned here so I figured, why not? I also used the heat gun that was in the stash, as well as the Stampin' Up blender pen (first time!) and used some of the Stampin' Up embossing powders. All in all I am pretty pleased. Here's what I came up with!


 A gold embossed leaf on vellum.
 The leaves that were in the above mentioned purchase. I tried three projects, kept two of them and not overly thrilled with either one, but...

Two more with the gold embossed leaf. Still something I am not completely sure on how to make it look its best, but the only way to get better is to experiment right?


Did you make cards or any other projects today? Perhaps you had a nice fall day where you are and you enjoyed that instead. Either way, thanks for stopping by. (here is the link to part 2)
~Jen

Friday, September 30, 2011

A Halloween Mantel

We made it to Friday! I am quite sure I am not the only one excited about that!!!!!! I was catching up on some blogs the other day and noticed that All Things Thrifty is doing a Halloween Linky Party every Friday starting today and running until 10/28. This is a place to put all of our Halloween ideas together.  Old ideas, new ideas, crafts, decorations, costumes, pumpkins, recipes etc! If it is Halloween, Brooke (and the rest of us) want to see it.
I went WAY out of my comfort zone last year and we decorated for Halloween. It was fun. I think it turned out quite well. I am not so sure we will go this route again this year, but only time will tell that. Whether we go this way again or not, I am definitely glad we have photos of it! I am going to post the mantel this week and I am thinking I will post the dining room next Friday (Perhaps I should get that post done now and get it scheduled to publish).
Anyway, here is last year's Halloween Mantel! This was the first year I had done anything like this! The combination of lights made it hard to photograph, but you can get the idea (and we weren't blogging then)!
The 'tree' on the right side of the mantel was actually a branch that dried better than I could have asked for and I am pretty sure we won't be doing that part again just for that reason. The heads on the 'tree' were part of a skeleton garland I purchased at the dollar store. We cut the heads from the garland and gave each of them their own loop to hang them with . The 'photos', the skull, the glow in the dark skeleton on the mirror, the cobwebs, the skeleton garland also came from the dollar store!

There were some old oven racks in the basement when we bought the house. We kept them for some reason. We pulled one out for this fireplace deco! Jim took a string of purple lights and wrapped them around the oven rack. We placed the oven rack in the back of the fire place and then set the gargoyle in the fireplace. (The gargoyle was purchased at TJ Maxx last year)
Cobwebs. Lots of cobwebs. Why do I work so hard the 11 months of the year to keep them from forming...
We had a black light sitting on the mantel to help with all the glow in the dark stuff. It had some cool effects.

I am linking this up to All Things Thrifty For the All Things Spooky Linky Party. I hope you will stop by and check out some of the other projects! Thanks for stopping by. Please leave some comment love and let us know you were here! Have fun getting ready for this year's Halloween.
~Jim, Jen and Jynx (Halloween is her favorite holiday!!!)

Thursday, September 29, 2011

Happy 6th Birthday Natalie!

Our neighbor Natalie turned 6 yesterday! For her birthday we made her a book about the plants in our garden. Natalie loves coming over and learning the names of the different plants/flowers (and helping out in the garden). She can tell you the names of some of the plants on her own and there are others that if you give her a hint she can finish the name! Naturally, all the flowers are beautiful to her! We went for a walk up the street one night and she was naming the plants in someone else's garden. That was pretty cool!
Since she is so curious and at an age where she can soak in all sorts of information, we made her a book. We may have some studying of our own to do over the winter as we included the latin names in addition to the common names of the plants. :)
It wasn't until I started uploading photos for this post that I realized we didn't get a picture of the outside of the book. The book was an 8x8 scrapbook with top loading sleeves. It had a ribbon and button closure.  I hot glued a big fabric flower to the original button. It was cute, you will have to trust me!  We aren't sharing the whole book because that would be a pretty photo heavy blog post! Here is a peek into Natalie's gift! The inside cover page...
The letter that follows the title page...
A few of the pages from the book. Bee Balm
Columbine
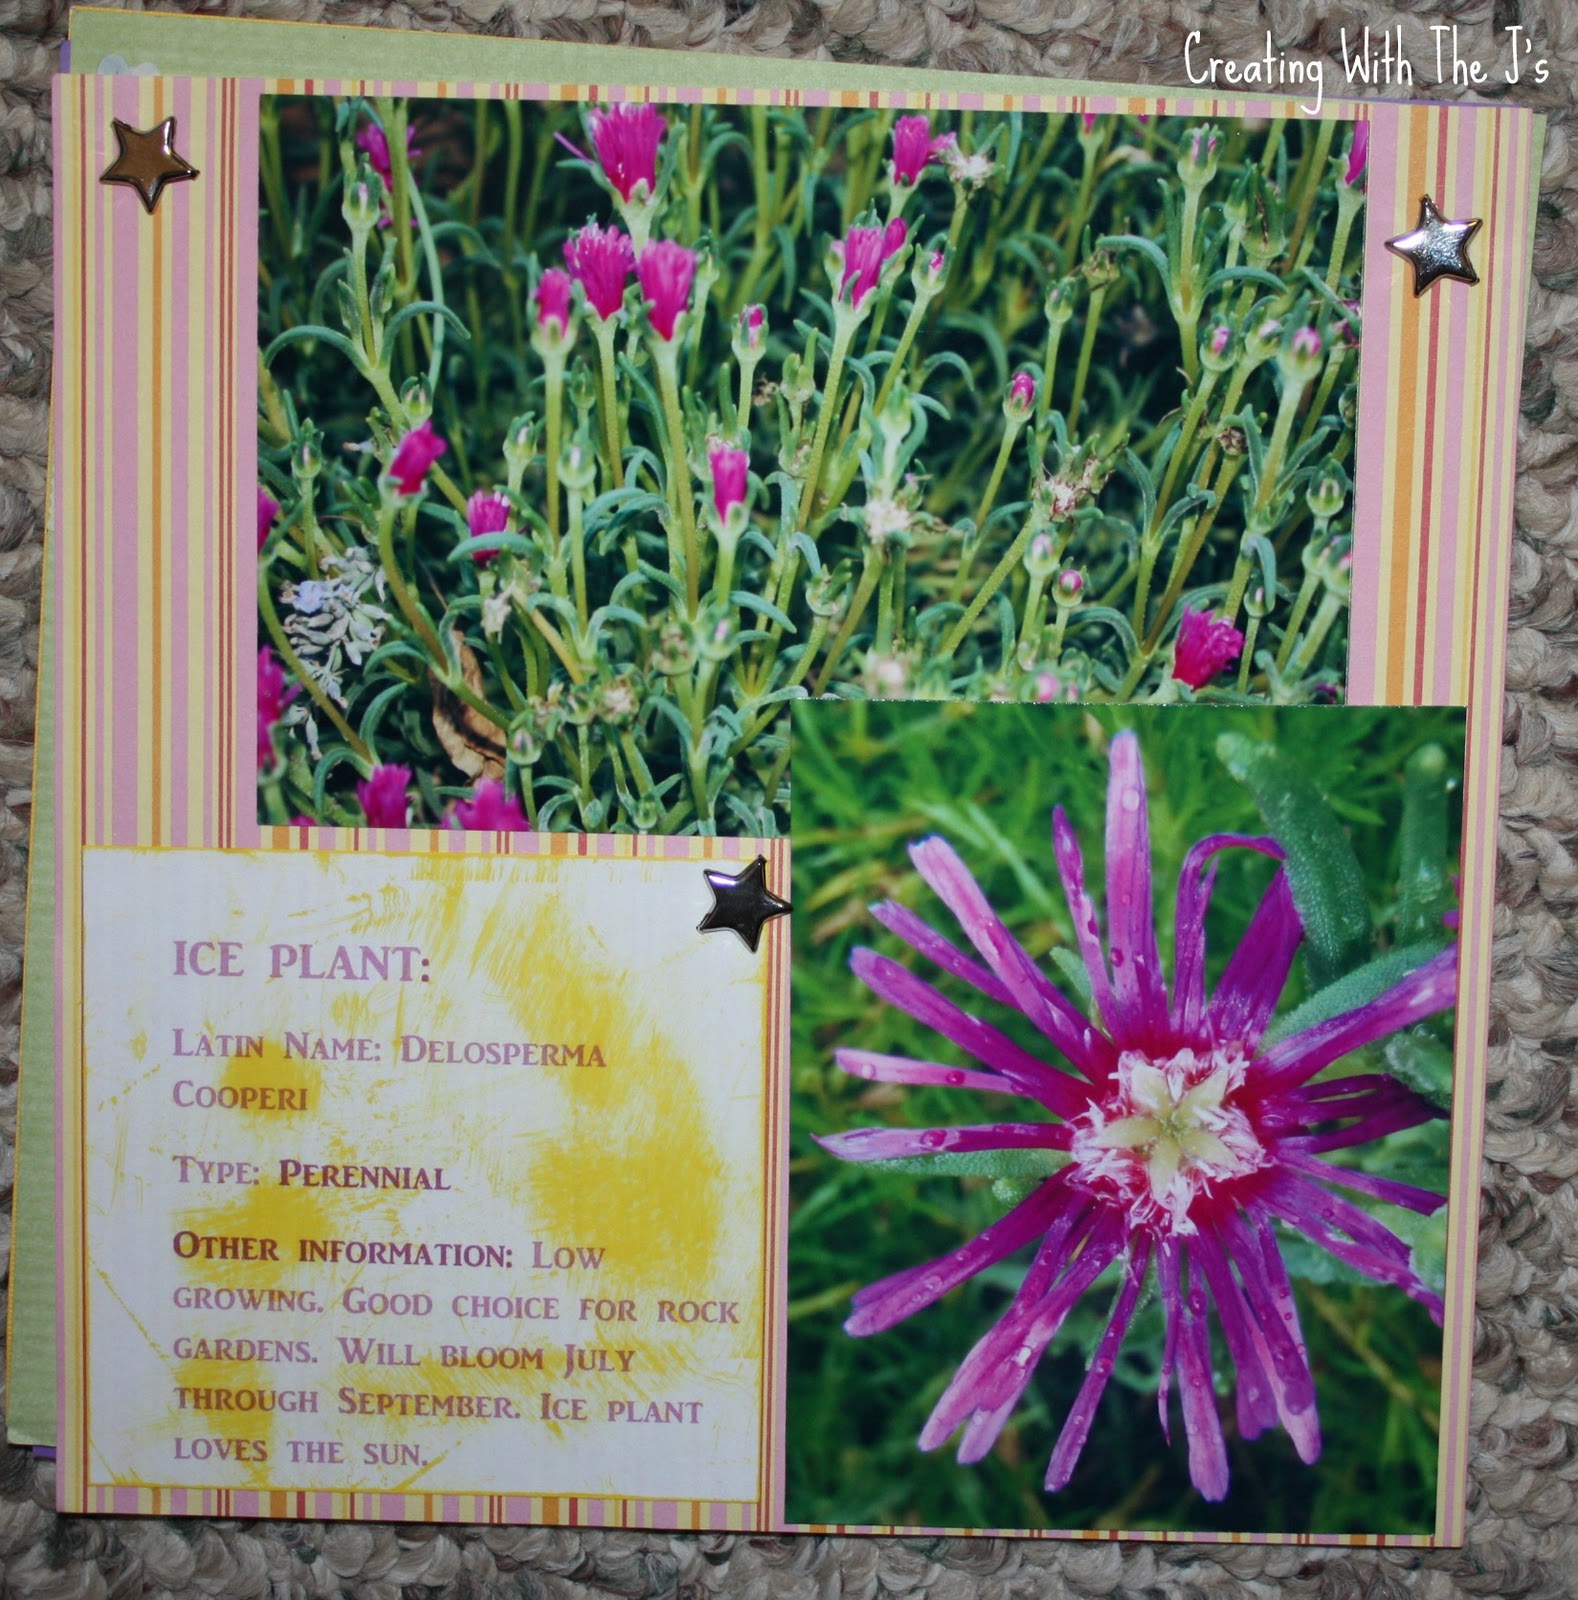
Ice Plant
Astilbe
A page for Natalie to collect her thoughts
If you look closely on the right edge of this photo, you can see part of the flower and a tiny part of the stripes that are on the cover of the scrapbook.
Natalie's favorite, favorite, favorite would be the pink roses--especially when the petals are all over the ground. It is a sight too cute for words. I found this picture last night after Natalie was disappointed there wasn't a picture of the pink roses in the book (there is one empty photo space for the picture though). I didn't think we had any pictures of the roses and once I dug a little deeper I found one. We will be printing this picture and giving it to Natalie to fill in the last photo sleeve!!!
One last picture, of the birthday girl herself! There were several silly, yet cute pictures taken this day, but since I don't want her to hate me forever when she gets older I chose the one I know she likes.
HAPPY 6TH BIRTHDAY NATALIE!
YOU ARE AMAZING!
xoxo Jim and Jen


Thanks for stopping by! I hope you enjoyed Natalie's book!
~Jen


Wednesday, September 28, 2011

Caught acting like a cat!

Hi Everyone! This is Jynx! I have to share with you what happened the other day. I am still embarrassed by it but what am I to do? So the humans FINALLY  left clothes in the clothes basket and left the basket on the couch! Everyone knows a basket full of clothes is a great place for a cat nap! I apparently napped too long because I was caught in the act. Not only was I caught acting like a cat, the male human captured my picture.

You see I don't act like a cat for extended periods of time. Just about the time the humans seem they are enjoying themselves I jump down and run away. If only I had heard him come through the door...
The female human thought she was going to put those towels away the next day. I showed her who was boss! She picked that top one up and headed for the linen closet. When she came back for the others I was already back in the basket assuming the nap position. I wasn't letting this cozy nap space go away so easily. It did go away after a couple days but I am hopeful the opportunity will present itself again soon.

Off to find a new place to nap.....Jynx

LinkWithin

Related Posts Plugin for WordPress, Blogger...