Showing posts with label recipes. Show all posts

Monday, December 17, 2012

Moon Pie Magic #2

Hello Dear Followers!
I apologize for the lack of posts last week. Just some craziness going on. I will hopefully get caught up on the Christmas posts this week, in between more craziness, but I will manage. I hope life is a crazy good for you!

Moon Pie Magic #2. Kinda crazy. I know it will  be much crazier when that number is in the double digits though. I told you I thought #2 would come from Betty Crocker's Cooky Book. My thoughts were correct.

Here is a look at the cover.


Copyright 1963 by General Mills
This cookbook was used by my Great Aunt while she was taking care of her father.
(There is a note in the front stating so)
Did you notice the spelling??


This is the note on the back side of the title page.
The last sentence says "Remembering the motto "happy the home with the fully cooky jar," we hope you'll turn to this book often."

Do you always have a full cooky jar or at least cookies at the ready?
I know Jim's Grands always have cookies in the freezer.


A look at the table of contents.
The Cooky Primer has lots of hints, tips and how to's.
You can even find solutions for dry and soft cooky dough.

The following hint is from page 19:

"Sticky fruits can be cleaned from your food grinder quickly and easily by running a few small pieces of dry bread through it."

That nifty tip was found on the page with the some filled cooky recipes.

I think we will see more than one post from this book so I didn't take  a lot of pictures or search for all the cool tips and tricks.


The recipe we are going to look at today is on the right hand page in the above photo.
Do you see my Great Great Aunt's handwritten notes??
Again... LOVE THEM!


Yes, we are going to make chocolate crinkles.
That is them pictured in the lower right hand corner!

Here's the recipe:

Chocolate Crinkles
1/2 cup vegetable oil (we use canola)
4 squares unsweetened chocolate (4 ounces)
(I tried to get a picture, but dreary days and poor lighting worked against us)
2 cups granulated sugar
4 eggs
2 teaspoons vanilla
2 cups Gold Medal Flour
2 teaspoons baking powder
1/2 teaspoon salt
1 cup confectioners' sugar

Mix oil, chocolate, and granulated sugar. Blend in one egg at a time until well mixed. Add vanilla. Measure flour by dipping method (p.5) or by sifting. Stir flour, baking powder, and salt into oil mixture. Chill several hours or overnight.

Heat oven to 350°. Drop teaspoonfuls of dough into confectioners' sugar. Roll in sugar; shape into balls. Place about 2" apart on greased baking sheet. Bake 10 to 12 min. Do not overbake! Makes about 6 doz. cookies.

Note: If you use Gold Medal Self-Rising Flour, omit baking powder, and salt.


4 ounces of chocolate...melted.
My Great Great Aunt's notes:

"Looks just like picture. REALLY YUMMY!"
"Make small don't spread much"
Don't roll in xx sugar until the instant they go in oven.
Roll twice.

Let's take a look at some of the book shall we?


Look at those spreads.
This furthers my love affair with most things vintage!


Pretty and fun and yes those are the chocolate crinkles in the lower right!


The back cover.
I look forward to sharing more from this book.
Definitely some fun and interesting looking recipes and tidbits inside!

Wait what???
You are upset because I didn't show you how the cookies turned out?
I didn't forget, I saved that picture for last!!


THEY ARE DELISH!
I wish you lived closer and we could share them.

If you missed MPMM #1 you can read it HERE

Thanks so much for stopping by. I hope you will leave some comment love so I know you were here!
Do you make chocolate crinkles as part of your Christmas cooky list?
Do you call them something else?

Oh, I am going to research the spelling of cooky!

Hugs!!!
~Jen

Monday, December 10, 2012

Moon Pie Magic Monday #1

Hey Blog Followers! It seems we have made it through another Monday! Thank goodness for that!!!
Well, I am FINALLY getting to one of the weekly posts you have read about here and maybe even on Facebook. The decision making process was tough, so tough that we will have at least two weekly posts, possibly three...all from the awesome titles everyone suggested! Thanks for your creativity!!

IF YOU ARE LOST by the first paragraph, please read further before moving on to your next blog! The first of October we received not one, but TWO 35 pound boxes full of recipes!!! Books, magazines, clippings, boxes, and handwritten recipes. All of these recipes, books, magazines, belonged to either my Great Great Grandmother, Great Grandmother, Great Great Aunt or Great Aunt.  My Great Aunt is the only one of these wonderful ladies still alive.  She told me she didn't send me any of her books because she is still using them, but it seems she slipped one or two in the boxes! Here is a look at the boxes the day they came...


THE ORIGINAL POST about those boxes has the first recipe that was shared. It was a hot dog sauce recipe. We froze a good bit of the recipe that night. It made great chili cheese fries over the weekend. YUM!

I still can't get over the age and condition of some of these books. Yes, there are some that nearly disintegrate just by looking at them, let alone touching them, but there are others that make me shake my head at the thought of how old they are. Truly quite the treasures!

Moon pie Magic Monday is the nickname for "Moon Pie Magic and other tales of food gone by."  Moon Pie Magic Mondays will all come from any one of the cookbooks in our house. We also have cookbooks from my Grandmothers, Jim's Grandmother and Great Grandmother. We shouldn't have to eat the same meal twice in this house!  Sometimes you will get to see how the recipes worked (or didn't work) in our kitchen and other times I will just be sharing tid-bits from one (or more) of the cookbooks.

I was hoping to share pictures of a recipe with you this time, but as I started pulling the ingredients out I discovered that we didn't have them all. {big sad face}.

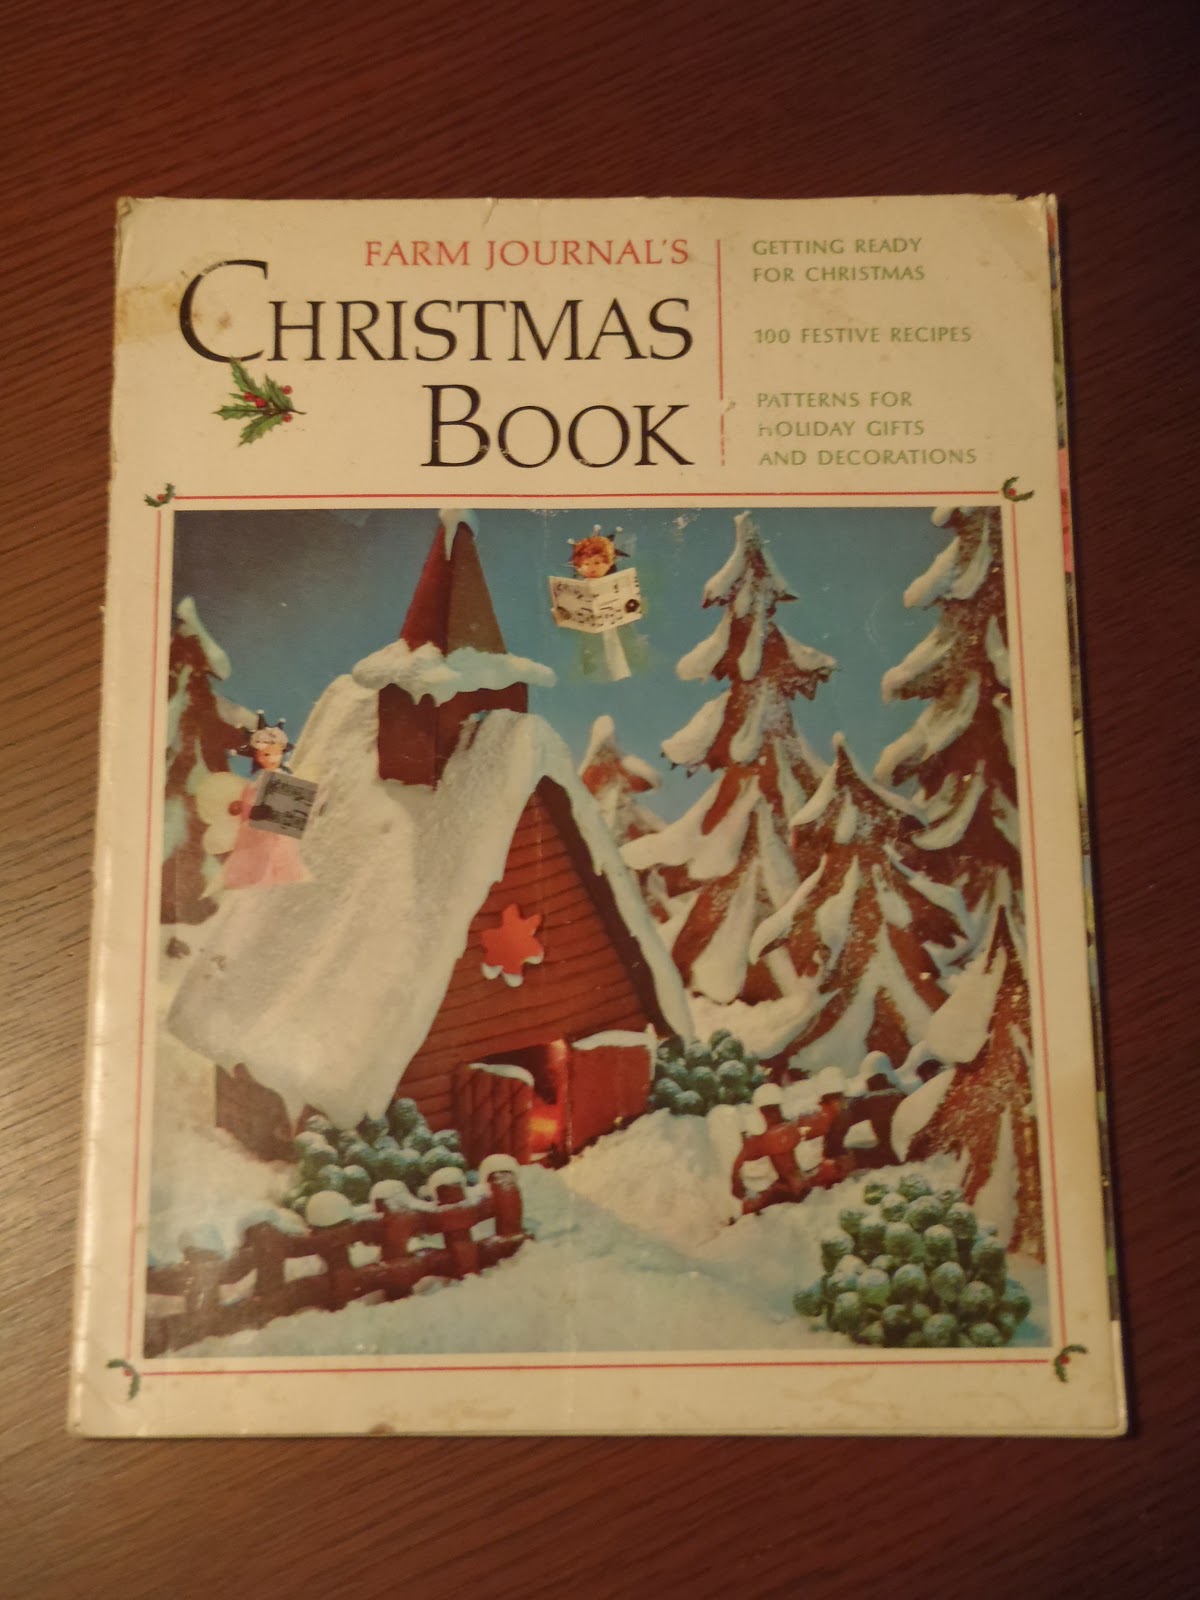
Without further ado...Moon Pie Magic Monday #1 is about the Farm Journal's Christmas Book.


This issue was printed in 1966.
I did a little consulting with Dr. Google and there are definitely copies out there in better shape than this one, but...

It is packed full of pictures, recipes, crafts and tips and hints.


On the bottom of page 6 (pictured above) it says
"Round-robin basket gifts are a custom in Connecticut neighborhoods.
You carry your food specialty to your neighbor; she in turn puts her specialty
in the basket and takes it to the next person on the list,
who does the same..."

It saddens me that today's society is so impersonal.


Ah, the fruitcake. Do you have one in your family? Oh wait, I meant for that to say
Do you have a fruitcake maker in your family?? (he he he)

It provides 6 different fruit cake recipes.
One of the pages says "Many families pass cherished Christmas recipes from one generation to another.
If you haven't a favorite, try one of these and start your own tradition!"


The recipe I was hoping to share with you is shown on page 30.
Crackled Sugar Cookies.
There isn't any lemon or orange extract in my cupboard. It is on the grocery list though!


There is the close-up of the recipe.
YES!!! YES!!! YES!!! You see handwritten notes.
I think the handwritten notes are one of the best parts of these boxes full of treasures.

I am still learning the differences in handwriting, but I believe this to be my Great Great Aunt's handwriting.
Her notes are this:

* Grated rind of 1 lemon or 1 orange and 1/4 cup sugar to roll in

* The first time - failure

*2nd time- great success use 1/4 cup flour more

* Roll in Coconut also

*Place far apart

* See snicker doodles pg 23 Betty Crocker Cookie book


How neat! The first time she made them, it didn't work out. 
She tried again and had great success. 
I'm guessing since they get placed far apart they must SPREAD!
Oh and the Betty Crocker Book, I believe that is going to be MPMM#2 and will definitely have results from the kitchen. A couple recipes have made their way to the list for Christmas cookies.

When we get these crackled sugar cookies made I will be sure to let you know!

Onward through the book, shall we?


Christmas tree cakes.
I thought these pages were neat because there was also a newspaper clipping attached.
The clipping appears to have the same photo as shown here.
The clipping says:

"For your Christmas table, here's the perfect decoration! Festive cakes baked in the shape of miniature Christmas trees, trimmed with frosting and fancies. They're easy to make, good to eat - children will love them. A wonderful gift idea, too -- carry a decorated cake to friends nearby. Or mail cake molds to faraway friends, so they can bake and trim their own little trees! If you're serving guests at small tables, place a cake tree on each table for a conversation piece dessert. Tree cake molds have been fully tested by home economists and are easy to use. Tree cakes can be baked any size up to 7" high and the molds can be used again and again. Use any packaged cake mix or your own recipe. The complete cake mold kit consists of 3 aluminum molds and an assortment of imported gold and silver dragee fancies (like those used on wedding cakes) PLUS a colorful array of sugar crystals. All enough for several cakes. Cake mold kits are perfect birthday, bridge or holiday gifts and are unusual club door prizes. ORDER NOW and enough cake mold kits if you want to be sure of early delivery. 1 complete kit $2.75; 2 kits $5.25; 3 kits $7.50; Additional kits over 3, $2 each. Send check, cash or money order to:"


Tips and tricks for the gift-giver. 
I thought the piece on how to warm up a money gift was an interesting read.

There were craft instructions, cookie centerpiece instructions, table top trees, crafts for kids...
It was definitely a trip back in time!!

One last tip I found and wanted to share:
"When cracking nuts for holiday baking: In a thick sponge, make a hole the size of the nuts you wish to crack.  Place sponge on hard surface; place nuts in hole; crack with heavy hammer. This method keeps pieces of shell from flying"

SO!! What are your thoughts on Moon Pie Magic Monday?
The 1966 Farm Journal Christmas Book?
The cookies?

Thanks so much for stopping by!!!
I hope you will be back soon!

Hugs!
~Jen

Tuesday, November 20, 2012

The first of MANY family recipes

Thanksgiving is almost here! Are you all ready or do you need to make one more trip to the store? I am making one more trip a little later tonight and then hopefully I won't need to go back for a few days!

Awhile back I received not one, but TWO 35 pound boxes from the UPS Man! He carried them both to the house at the same time! I thanked him A LOT!!! He told me someone knew how to pack! I told him what was in the boxes and he said "I'm glad I didn't lose these two. These boxes are filled with treasures!" Yep! TWO boxes FULL OF TREASURES!!!!!


Box One


Box Two

TWO BOXES full of recipes. Recipes from my Great Great Grandmother, Great Grandmother, Great Great Aunt and Great Aunt. The boxes were sent to me by my Great Aunt.
There are some AMAZING AMAZING things in these boxes.
The boxes have been emptied and thrown away.
Most of the cookbooks have been given homes around the house.
There are some that need me to make a trip to Staples or another such store and buy some plastic sleeves.
There are others that are sitting in a pile because I am just not sure what to do.

There are cookbooks galore! One was published in 1890!! LOVE IT!
There are handwritten recipes...from my Great Great Grandmother.
Her handwriting was BEAUTIFUL!

In the second picture you can see a box in the lower right hand corner.
Yep, a recipe box. Plenty of handwritten recipes there!
That isn't the only place one will find handwritten recipes.
The most recent place I found a handwritten recipe was on the inside cover of a cookbook.

There will be many posts coming from these boxes of treasures.
There is also some discussion to be had about these boxes of treasures, and I think I am going to make that a post all it's own.

The first recipe I am going to share with you is a hot dog sauce recipe.
The recipe is titled "Texas Hot Sauce"
I suppose the hot is all in the eye of the beholder!

This was a family recipe that came from a hot dog shop that is no longer open.


You will need:

2 pounds ground meat
1 cup onion
2 TBSP butter
2 cans tomato soup
2 cups water
2 TBSP chili powder
(we used chipotle powder and less of it. we were out of regular chili powder and realized so too late)
1 tsp paprika
3 TBSP flour
2 tsp salt
1 tsp cloves
2 TBSP mustard
4 TBSP war sauce
(that is how it was listed on the recipe. what do you call worcestershire sauce?)
2 TBSP sugar
1/2 tsp cinnamon
5 dash tabasco


browning the meat


meat draining


it didn't say so, but we cooked the onions and the butter for a few minutes before adding everything else 


bubbling away


What we didn't take was a picture of the chili cheese fries we made!
They were pretty AND pretty tasty!

The cloves give it a flavor that stands it apart from other hot dog sauce recipes you have had.
(or at least that I have had)

We made our chili cheese fries the night we made this. **Ok, OK!! I was working, Jim made the recipe AND took the pictures. I ate the chili and am writing the post!** And we froze the rest in a couple sour cream containers for later consumption. Yep, it makes enough to go around!

Please go to this post and offer your opinion on what to name the posts about all these wonderful treasures!

Hugs
Jen

Linking up here:

Fridays Unfolded

Saturday, September 1, 2012

Cucumber Sauce Recipe

Hi All!! I hope you are safe and dry where you and yours are. The remnants of Isaac are making their way into Western Pennsylvania as I type. The rest of our Labor Day weekend is looking like a wash out. Kinda sounds like a good couple days to get something done in the craft space, doesn't it? I hope so! I have a couple Cartridges laying here trying to decide where I want to start!!! I can't wait!!!

Today I am sharing with you a recipe for cucumber sauce or Tzatziki. We have a hot dog shop not far from us that also serves some Greek dishes. This tzatkiki sauce comes with a couple of the dishes and is D-E-L-I-S-H.  We've been wanting to try our hand at it and I FINALLY remembered to buy the Greek Yogurt so we could give it a shot! This is a common sauce for souvlaki or gyros.

I did some reading and looking and more reading and more looking. It can be made with regular yogurt, but the yogurt will need strained. Everyone has variations to how they make it.


Looks pretty tasty huh???

Here's what I did.
...and when I do it over again, I will only make half of this recipe...
Hey! It is just the two of us!


3 cups Greek Yogurt 
(if you are going to use regular yogurt, please spend some time with your best friend "Google"
Juice of one lemon
1 garlic clove, chopped (garlic powder will work)
2 medium cucumbers, seeded and diced
1 Tablespoon kosher salt (for salting the cucumbers to help draw out some more liquid)
1 Tablespoon chopped fresh dill
Salt and Pepper to taste

Peel the cucumbers, use a spoon to scrape out the seeds.
I can't show you a picture of this part because I was using cucumbers that were leftover from making
refrigerator pickles. Anywho...
Slice the cucumbers into a colander and sprinkle the 1 tablespoon salt on to the cucumbers.
Let the cucumbers sit 15-30 minutes to draw out water. Drain the cucumbers.


In your food processor, add the cucumbers, garlic, lemon juice and dill and process until well blended!
Stir this mixture into your yogurt. Add additional salt and pepper for your taste.
Refrigerate for a couple hours so the flavors can marry!
Ours only refrigerated for an hour. It was good, but it was WAY WAY WAY better the next day!


We grilled up some chicken that had marinated in Italian dressing and some garden fresh onions and misc. peppers. This made a great dipping sauce. It also made me wish for a pita, that would have made it perfect.
This will keep in your fridge for a few days.
Some liquid will separate from the sauce and I would drain that liquid off and then stir your sauce back together.

I hope you enjoy! Have a great rest of the weekend and thanks so much for stopping by!!!
hugs
Jen

Saturday, August 4, 2012

Yellow Summer Squash recipe and some ramblings

Ah, Ma nature can't make up her mind. We had days of rain and now we have gone days without rain. The garden is looking pretty droopy and I believe we are going to have to water tonight. /sigh

I am writing this post as Jim is in the kitchen fixing the drain for the kitchen sink. Last night as I was draining the dish water from washing all the mason jars we picked up at a sale yesterday, my toes started getting wet. I initially thought I had "splashed" with the dishwater, but definitely not the case. A seal or something let loose. So...that meant the squash I picked this morning were washed in the bathroom sink. That makes me giggle for some reason.

A week ago we tried out a new recipe. Yellow squash summer relish. We grew a couple squash plants this year, but we didn't have any specific recipes in mind. I came across this recipe in a magazine I picked up. We weren't sure what it would taste like. We gave it a shot and if it was a failure, I am pretty sure I knew of some people that would have taken it off our hands. However, a failure it wasn't and the results are going to the canning cellar.

Let's take a look.


I LOVE LOVE LOVE magazines!
I don't know why, but I do!
Magazines with pretty jars on the front (even when those pretty jars require lots of work) are no different.
There are some amazing recipes in these magazines.
Recipes like Yellow Summer Squash relish and Tomato Basil Jam.
Are you grinning and maybe even drooling just thinking about it??
he he


The inside pages are just as beautiful as the covers!


So I prepped the squash -- yep fresh from our garden


Used the food processor to get it, peppers and onions to this point.


This is what it looked like when I took it out of the fridge the next morning.


The final result.
Ready to see the recipe?

Here it is:
Pretty simple really.

10 cups shredded yellow summer squash (about 4 pounds)
2 large onions, chopped
1 large green pepper, chopped 
(I used peppers from the garden of different hotnesses..roughly 1 large green pepper)
6 tablespoons canning salt
4 cups sugar
3 cups cider vinegar
1 tablespoon each celery seed, ground mustard and ground turmeric
1/2 teaspoon ground nutmeg
1/2 teaspoon pepper

In a large container, combine the squash, onions, green pepper and salt. Cover and refrigerate overnight.
Drain; rinse and drain again.

In a Dutch oven, combine the sugar, vinegar and seasonings; bring to a boil.
Add squash mixture; return to a boil. Reduce heat; simmer for 15 minutes. Remove from heat.

Carefully lade hot mixture into six hot pint jars, leaving 1/2 inch headspace. Remove air bubbles; wipe rims and adjust lids. Process for 15 minutes in boiling water canner. Refrigerate remaining relish for up to 1 week.

YIELD: 6 pints

This batch didn't have any turmeric added because there wasn't any in our pantry.
The batch that I am processing this evening will have turmeric added. I can't wait to see the color difference and the taste difference too.
This batch is AWESOME!!!! on burgers. We think it would be EXCELLENT on hot dogs.
We will be trying that sometime this week.

If you give it a shot, I would love to hear what you think of it!!!

I know you really came for the ramblings and not the recipe, so here we go.

Canning season conclusions I've come too so far this season. I find it interesting how I think about things differently now that I share things from our lives with you.

1. Canning Season: the easiest and quickest way to dirty EVERY bowl and every towel in your kitchen.
2. The season for a continually dirty kitchen floor.  ** I'm not saying I don't clean it. I sweep it every day to make sure the seeds and such are gone. I swear that stuff hides somewhere though. You sweep, empty the dustpan and hang up the broom and there is MORE on the floor. :( /sigh. 


Here are some of the tools of the trade. :)


This morning's harvest. That big yellow squash weighed 2 pounds 7 7/8 ounces.
That squash was shredded and is in the fridge doing its thing until later on.
The recipe says overnight, but by the time I get to it, it will have been in the fridge for 12 hours.

With all that produce and fixed drain in the kitchen sink, I must leave you and pay attention to these veggies.
I hope your weekend is shaping up the way you would like.
Any of you processing produce this weekend?

hugs!

Linking up Here:


Wednesday, July 25, 2012

Blueberry Muffins

I bought some local blueberries last weekend. I had intended for us to have blueberry pancakes but the weekend didn't allow for blueberry pancakes. Sooooooo, I made blueberry muffins!


I used the Barefoot Contessa's recipe.

3 ½ cups all-purpose flour 
1½ cups granulated sugar 
4½ teaspoons baking powder 
1 teaspoon baking soda 
1 teaspoon kosher salt 
2 cups buttermilk, shaken 
¼ pound (1 stick) unsalted butter, melted and cooled 
1½ teaspoons grated lemon zest 
2 extra-large eggs, lightly beaten 
2 cups fresh blueberries (2 half-pints) 

Preheat the oven to 350 degrees. Line muffin tins with paper liners. 

Sift the flour, sugar, baking powder, baking soda, and salt into a large bowl and mix together. In a separate bowl, mix together the buttermilk, butter, lemon zest, and eggs. Make a hole in the center of the dry ingredients and pour the wet ingredients into the dry ingredients. Mix with a fork just until blended. Fold the blueberries into the batter. Don’t over mix! With a standard (2¼ -inch) ice-cream scoop or large spoon, scoop the batter into the prepared cups, filling them almost full. 

Bake the muffins for 20 to 25 minutes, until golden brown. 

I don't have enough muffin pans to make the 20 muffins the recipe said it would.
I got brave and sprayed my mini muffin pans, said a prayer, and scooped the batter into the mini muffin pans.
I don't have a picture, but they came out in one piece. ALL OF THEM.

The muffins are almost gone. I would like a little more lemon flavor in the recipe.
Very good as is, but we both think more lemon would be good!

Blueberry pancakes or blueberry muffins. Which do you prefer?
What do you do with your blueberries?


Monday, June 11, 2012

Sugar Snap Peas - from seed to our plates!

Part of the reason I was so absent for awhile was our garden. I love being outside and I also love having a a great backyard. Part of that great backyard is EDIBLE!!!!!! The work is paying off. We had our first batch of sugar snap peas for dinner last night.  We've eaten many peas. It is hard to walk by them and not pick one or two and it eat it/them right then. They are so sweet and fresh and crunchy! We were weeding the garden last week and I picked a pea and Jim heard me crunching.  he he he

Here is the life story of our peas!


The peas were planted 3/18/12.


They say to plant them by St. Patrick's Day.
We were close.


3/30/12 a pea sprout!!!
You have no idea how excited we were!
Neither one of us had ever grown peas before!


4/12/12 getting bigger


4/16/12 we gave them a fence
oh my...looking at this picture and know what the garden looks like now...


4/25/12
We planted two rows because that is what the seed packet said.
We used some of our insulators to make the fence more "us!"

 4/25/12 
They are growing up.


5/1/12 and growing...


A blossom!!! 5/25/12


We had to make the fence higher.
We also moved the peas into just one row.
This photo taken 5/30/12


We have pea pods!!!! YAY!!!!


6/3/12
They are higher than the added height.
Yes, this has been a learning process!


more pods


Not a great shot, but...you can see how they have filled in.
Taken 6/6/12.

Yesterday, we took the little colander outside and picked peas for dinner.
We may have eaten a couple while picking!!
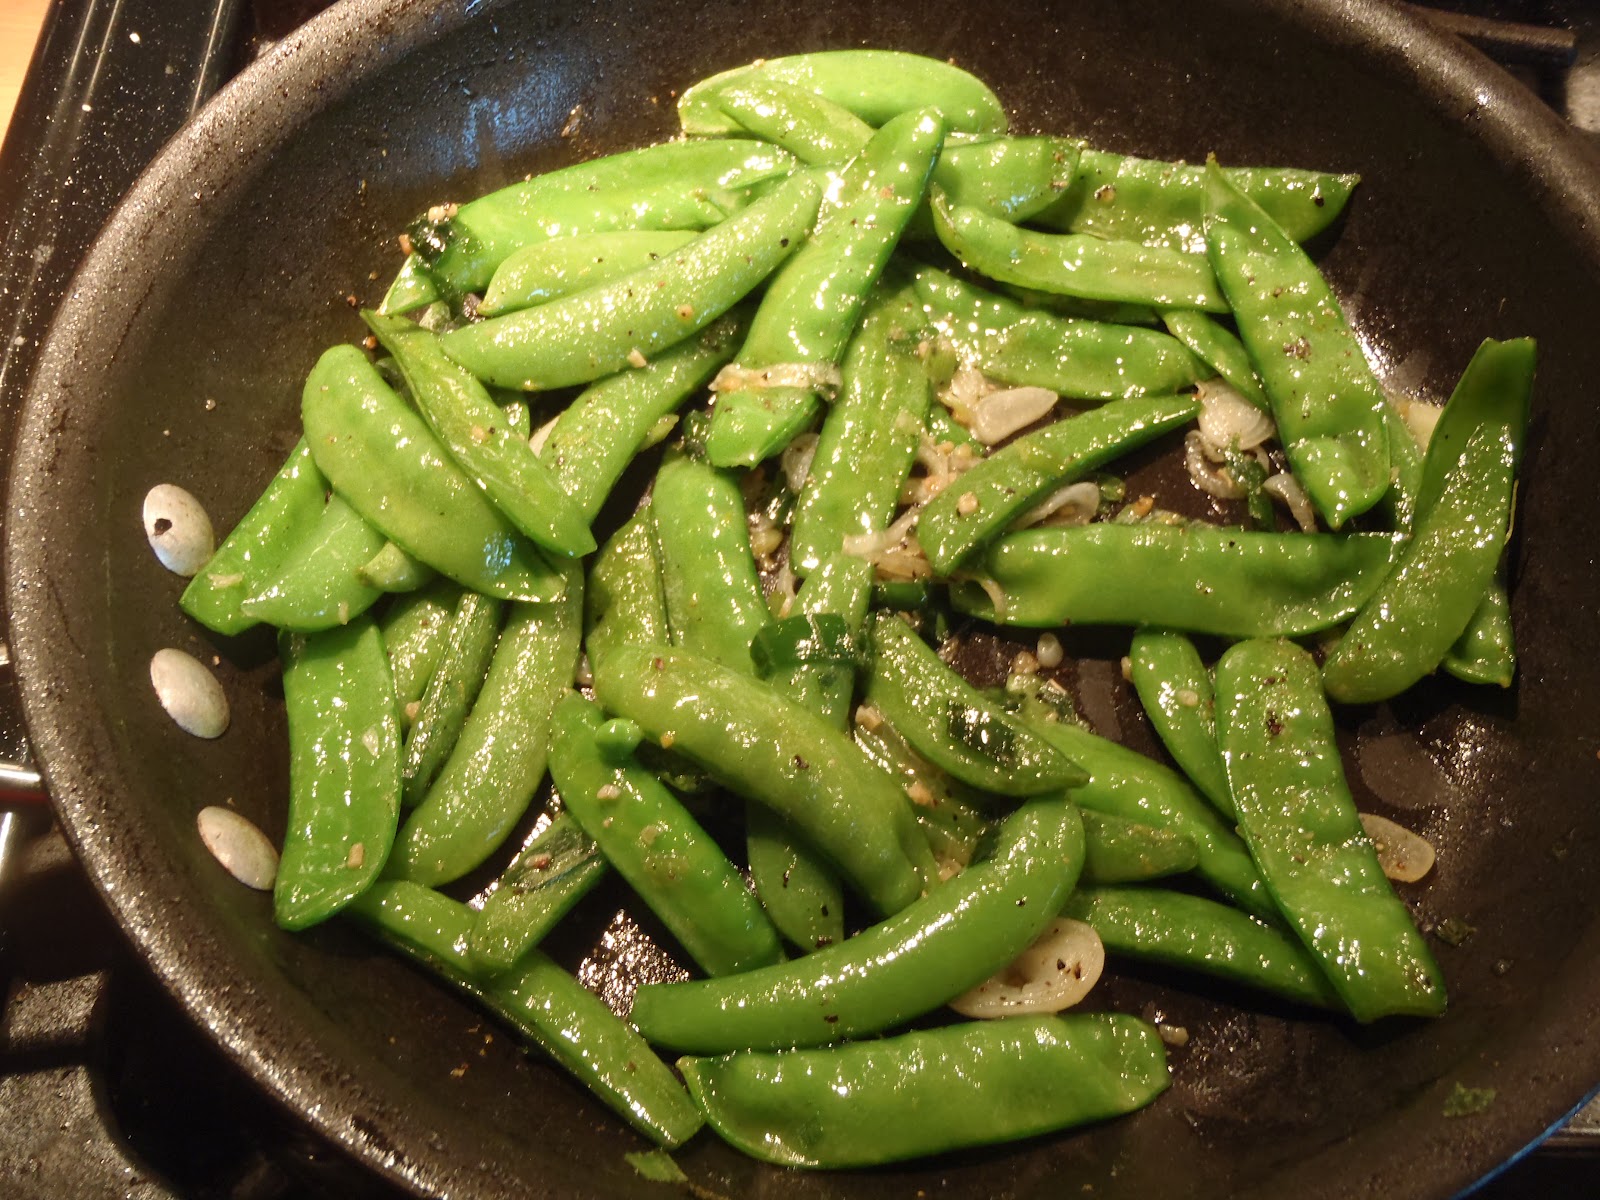
We gave them a rinse, took off their strings and cooked them up.
It was nice knowing there weren't all kinds of chemicals on our veggies!!


Aren't they pretty?
Here's what we did!

INGREDIENTS

  • 2 tbsp olive oil
  • 1 pound sugar snap peas, strings removed
  • 3-4 scallions or green onions, sliced on the diagonal
  • Salt
  • A pinch of sugar
  • Zest of a lemon
  • 3 Tbsp chopped fresh mint
  • Black pepper to taste
  • Lemon juice to taste

METHOD

1 Heat a large sauté pan on high heat for 1 minute. Add the olive oil to the hot pan and heat it until it shimmers, about 1-2 minutes. Add the sugar peas and toss to coat with the oil. Sprinkle salt over them and toss again. Allow to cook, undisturbed, for 1 minute.
2 Add the green onions and sprinkle with a pinch of sugar. Toss to combine. Let cook for 1 minute. Toss and cook untouched again, this time leaving everything undisturbed for 2 minutes.
3 Turn off the heat, mix in the lemon zest and mint, then add black pepper and lemon juice to taste. Serve at once.
Yield: Serves 4-6.

We did not add the mint, but did follow the rest of the recipe.
The recipe was found here. We used fresh onions from the garden. This dish was yum-mee!
The rest of the meal was bbq chicken and oven roasted potatoes. We should have taken a picture of a plate, but Jim did take a picture of the potatoes.

Those are pretty too huh?
They are little potatoes (sadly not from our garden)
tossed in olive oil, s&p and chopped rosemary (from our garden)
roasted off at 425 until done. stir them every so often.

I hope you are glad you stopped by today!!!
Hugs!
~jen


LinkWithin

Related Posts Plugin for WordPress, Blogger...